Clogged Faucet? No worries! Cleaning & repairing is easier than you think
If you’re annoyed by a clogged faucet in your bathroom and find yourself confused for a fix, fret no more! We’ve compiled some key information for you to understand the issues behind it and repair it yourself.
See if the faucet aerator is clogged
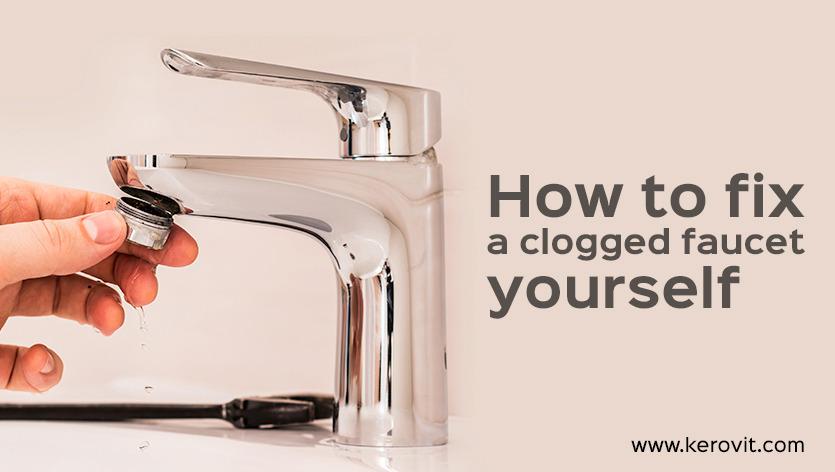
If your clogged faucet is a modern design, it has an aerator which looks like the tip of a cone. The aerator sits in your faucet and slows down the flow of water, giving it a more gentle feel. It also adds air to the stream, saving water by preventing excessive use of it.
Aerators are also often a source of clogs because they’re easy to neglect when cleaning around your sink. If you think an aerator may be clogging up your faucet, unscrew it with something small with a flat grip, like an Allen key or paperclip. You’ll want to do this both clockwise and counterclockwise to make sure you’re getting all angles (aerators are made from two pieces). Clean out any debris that comes out around the threads of the aerator and reattach it back into your faucet.
If that doesn’t solve your problems, go ahead and try dismantling different parts of the faucet as much as you can with your own hands, before moving on to bigger tools—you never know what might’ve become wedged in there!
Checking all outlets for blockage
Using a wrench and adjustable pliers, remove the aerator from the faucet. Inspect the aerator for any debris or blockage. If there is no substantial buildup in this area, you can conclude that the problem is not at this outlet.
This next step involves removing both handles of your faucet by unscrewing them with an Allen wrench. This will allow you to get to the valves underneath, where you’ll check for clogs. Wrap a cloth around the ends of each valve before attempting to loosen them with pliers; this will prevent damage to surfaces if they happen to slip while in use. Remove all of the valves and inspect them for blockages or other obstructions that may be impeding their function.
If both valves are clear, you can conclude that there is no problem stemming from your sink’s pipe system, which means it’s unlikely that your problem is caused by an external source such as poor water pressure or lines that are too far apart from one another; however, it can be helpful to check these areas just in case — especially if you have experienced inconsistent problems with your faucet in the past but only recently had consistent issues resume again.
Make sure it’s not something in your pipes
In order to avoid any unnecessary work, it’s important to first check that the problem isn’t somewhere other than the faucet.
– Check your home’s water pressure by turning on an outside spigot and checking the flow of water. If the water is flowing well from that faucet, then you know it’s a problem with your indoor faucet and not a main water issue.
– Check your main water valve next to see if it is in the “on” position. A surprising number of people have had their plumbing problems solved when they realize they turned off their water and forgot about it!
– Check to see if all of your other faucets are working as well by turning them on one at a time starting with closest to furthest away from where you are working on your faucet. If they all turn on with strong pressure, then this too will rule out any major issues with the pipes or valves coming into your home or apartment building.
– Next check to see if there may be anyone else in your home using a lot of water at the same time as you are trying to use yours (like someone flushing a toilet, using a dishwasher/washing machine, etc). In multi-unit buildings, shared plumbing can quickly lead to clogs in individual units when many tenants try to use large amounts of water at once without having separate pipes for each unit.
Make sure you have the right tools to fix your faucet.
Before you start a faucet repair process, make sure you have the following tools to get the job done:
– Hand tools. You’ll need an adjustable wrench, a screwdriver and Allen wrenches for removing parts. Have one of each on hand so you can tackle any type and all parts of the faucet.
– Plumber’s tape. If you don’t have this in your tool box, it needs to be added. This is a simple yet effective way to improve watertight connections without forcing them too tight and causing damage. It can also help create an air-tight seal around aerators or any other part that threads into place on your faucet.
– Plumber’s putty. This material is ideal for creating water-tight seals around drains and sink fixtures because it forms to the curve of the sink while remaining flexible when the fixture moves slightly during use or installation.
Other ways to fix a clogged faucet
There are other methods to remove mineral deposits:
– Removing the aerator and brushing it with a toothbrush or pipe cleaner
– Running hot water through the faucet for 30 seconds, followed by cold water for 30 seconds (repeat 5 times). During this process, you must ensure minimal water wastage by exercising care and caution, because every drop counts.
If your faucet clogging issue still persists, feel free to contact us on our customer care.
